Content
- Types of dog collar
- dog guides
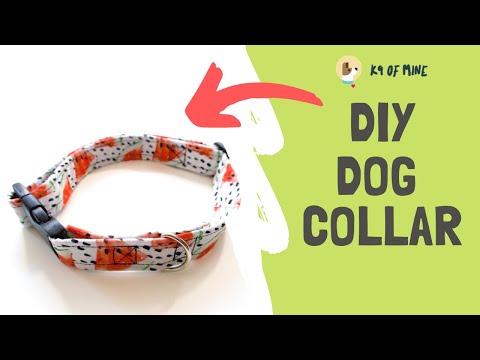
- How to make a dog collar
- How to make a custom dog collar
- How to make a 'bandana style' dog collar
- How to make a custom 'bandana' dog collar
- How to make a dog collar with rope
- How to make a dog collar with rope and fabric
A collar is a key accessory when adopting a dog. Much more than for aesthetic reasons, it is mandatory to ensure safety during walks and identification of dogs. There is no lack of color and model options in pet supply stores for the most different functions and situations, but if what you are looking for is something 100% authentic, know that you can make a dog collar and customize it yourself. The most important thing is that your dog is already adapted to walking with conventional collars and used to wearing collars. Under these conditions, you can already follow the instructions of the PeritoAnimal de how to make a dog collar: custom, identification or with strings! Gather the necessary materials, get to work and let the parade begin!
Types of dog collar
Before knowing how to make a dog collar, it is essential to know which one is ideal for your furry one, as there are different types of collars suitable for each size, situation, breed and behavior. Some of the most common types of collars are:
- Traditional collar: also known as a flat collar, it is one of the most common and aesthetic, but it is not always the most functional for all dogs. Dogs with small heads and those who pull a lot, for example, should not wear this type of collar as the pulling can cause breathing problems. On the other hand, it is an ideal option for dogs on their first walks in the process of adapting to collars, as it bothers less than the pectoral. Due to the model, it is also one of the most suitable options for dog collar with name.
- Chest collar: Also called a harness, the dog chest collar is a favorite among tutors and veterinarians for offering comfort and less risk of the dog getting hurt. The pectoral collar for dogs can be found in different models and materials, adjustable and adapted to different situations (walking, working, anti-pull).
- Halter: is the type of dog collar recommended for large dogs that are learning to walk or being trained and tend to pull a lot. Ideally, this type of collar is recommended by a veterinarian as improper use can hurt.
- THE choke collar it is not recommended by the Animal Expert. In very specific cases, some veterinarians and trainers may suggest the semi-hanging collar, for specific and supervised situations.
dog guides
At guides can also be called collars.. They are the part of the structure that connects the dog's collar to the walker's hand. As in the case of collars, there are different types of guides and some may be more suitable for certain dogs and situations. But, if the dog is already properly socialized and adapted to the walk, you can make a personalized collar as a guide.
Check out the tutorials on how to make a dog collar below!
How to make a dog collar
If the intention is to make a identification collar for a more aesthetic dog, you can bet on this super simple tutorial with accessible materials. As it is a decorative collar, you can wear it over the traditional collar or pectoral and make your puppy more stylish.
Materials for dog identification collar
- 1 plastic snap fastener (you can even use the one of a small backpack that you don't use anymore, for example);
- Nylon or polyester tape;
- Measuring tape;
- Scissors;
- Pencil or pen;
- A metal ring (could be the ring on a large key chain);
- EVA for crafts in the colors of your choice;
- Hot glue or super glue.
How to make a custom dog collar
You can check out the step-by-step instructions for making a custom collar in the video below. The procedure is as follows:
- use the measuring tape to measure the diameter of your dog's neck, but place a finger between it and the neck. A finger between the neck and the collar is an ideal reference to avoid it being neither too wide nor too tight;
- Add 12 centimeters to this size and cut the tape to a size that is twice that sum;
- Then, cut this tape half;
- insert the ring on one of the tapes and leave it right in the middle;
- pass the glue along the entire length of the tape with the exception of the loop part and glue the other tape on top, leaving the loop free;
- Install the hitch lock plastic at the end of each side of the tape, using the glue;
- As long as the structure of the collar dries, you can write your dog's name on the EVA and create new ones. collar customizations;
- Glue the ornaments on the collar, according to your taste and your pet's style, wait for it to dry and you already have one personalized dog tag collar and beautiful!
Check out the video tutorial on how to make a dog collar step by step:
How to make a 'bandana style' dog collar
Still talking about dog tag collar, another cute way to make it is this bandanna style that we'll show you next, a great idea for dog walking collar. Realize that the step by step to make this dog collar is super similar to the previous one, what changes are the final procedures.
Materials for dog collar 'bandana style'
- A nylon or polyester ribbon of the color you want;
- Bandanna fabric (square);
- Hook clasp (plastic buckle);
- accessories to decorate
- Metal ring or ring;
- Scissors;
- pencil and ruler
- Silicone or fabric glue.
How to make a custom 'bandana' dog collar
- measure the neck of the dog and add 12 centimeters to that measurement;
- Cut to that measure;
- Insert the ribbon into the ring;
- install buckle at each end of the tape and wait for it to dry;
- Now, with the piece of fabric, measure the part of the collar where the bandana should be and mark with a pencil;
- Since we're going to need a square, take one end to the opposite corner to mark and mark an extra 7 centimeters;
- Cut the fabric rectangle;
- For make the bandana, you should join the bottom right corner and fold it to the opposite side.
- Do the same thing with the lower left corner;
- Mark the ring size on the fabric and make a vertical cut;
- Glue the top with enough space to fit the collar;
- While it dries, you can print the prints on a different fabric or even EVA;
- Then, customize the bandana by pasting or sewing the patterns you created.
- Thread the collar through the fabric space of the band and the ring through the fabric cut. That's it, you already know how to make a 100% personalized and stylish collar for your dog.
Do you need usage tips? Take a look at the post about how to teach an adult dog to walk on a leash.
See the complete step of the bandana style collar on the PeritoAnimal channel:
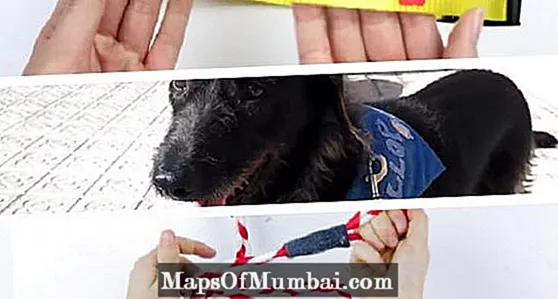
How to make a dog collar with rope
And for the joy of those who are not content with just the personalized identification collar, know that it is also possible to make a custom-made dog guide and style. This dog collar with rope, however, as in the previous case, is not suitable for dogs that pull a lot. Speaking of which, it's worth checking out the post about how to prevent the dog from pulling the leash.
Materials for dog collar with rope
- A thick rope;
- A ribbon or rope of another type;
- Carabiner;
- Scissors;
- Glue or hot glue;
- Fabric.
Note: We use thicker white string and red ribbon, but colors and materials you can choose. You can reuse ribbons you already have, or buy from a haberdashery or sewing shop. Let your imagination run wild.
When choosing the rope size, think about how you will need to bend and braid it. So it needs to be at least twice as long as the length you would imagine for the collar.
How to make a dog collar with rope and fabric
The step by step to make a dog collar is as follows:
- pass to thickest rope by carabiner and go sliding until the piece is in the middle of the rope;
- With the other tape, place it at the same point and give a knot in carabiner to get the braid done;
- Make one simple braid;
- With the braid ready, stick the three endss with hot glue and let it dry.
- Then shape the shape on the tip to hold according to the size of your hand and stick with glue;
- And then, you can use some fabric to finish this part and also glue it with hot glue.
- Do the same thing to cover the beginning of the braid, right under the carabiner;
- Wait for it to dry, check that everything is well glued and now you know how to make a dog collar with rope.
Check out the step-by-step video of how to make a dog collar with rope on the PeritoAnimal channel: