
Content
- Types of Scratchers
- Materials Needed for a Cat Scratcher
- How to Make a String Cat Scratcher
- Tips for a functional scraper
- How to Make Cardboard Cat Scratchers
You cat scratchers are a necessary and essential toy for any feline. Cats need to sharpen their nails, scratch and have a place that belongs to them, so to preserve your furniture and keep the feline entertained and healthy, the scraper is the solution.
Cats scratch objects to communicate with other cats and humans, and thus leave visible and smell messages. In addition, the scratching process is very important for it is also part of the cleaning, hygiene, play and emotional release processes.
Yes, we know that scrapers for cats can be expensive, but as this is a first-need item for your feline friend, in this post by PeritoAnimal we want to show you how to make a cat scratcher. A place where your pet will feel safe, have fun and where you can sharpen your nails, leaving all the furniture free of danger.
Types of Scratchers
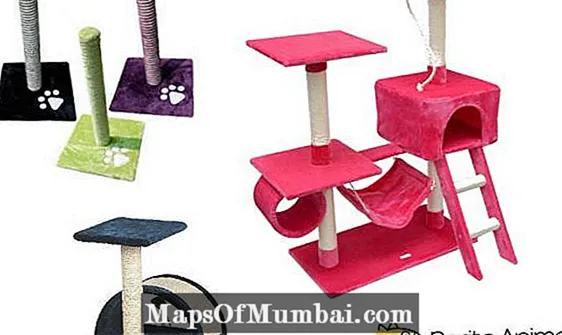
Making a homemade cat scratcher is easy. The first thing you need to think about is the design you're aiming for for your scratcher. There are many types of scrapers, so it's worth researching a few models to get ideas, in addition to taking into account the space you have available at home as well as your cat's needs.
You can even go to some pet stores or look on the internet to choose the right model. Keep in mind that your pet will not be very demanding and will be happy with any model you make. The only thing that is essential in the scratcher is to have a rough scratching area and a soft, padded area for your cat to rest.
Materials Needed for a Cat Scratcher
Once you've decided what kind of scraper you want to make, the next step is gather all the material. As we've already mentioned, you'll be amazed at how economical and easy it is to make a homemade cat scratcher yourself. The materials needed to make the cat scratcher are:
- Tubes;
- Wood pieces;
- Soft fabric;
- Rough mat (optional);
- String;
- Padded filling;
- Screws;
- "L" attachments;
- Contact glue;
- Stapler for quilting.
The tubes can be either plastic or cardboard, the important thing is that they are strong enough to support the structure you want to make. The number of tools will depend on how simple or complex you want to make your feline friend's scraper. Now, let's see how to make a cat scratcher step by step!

How to Make a String Cat Scratcher
To make a cat scratcher you just need to put glue around the tube, wind the string and pad the frames. But there are details that are important and make all the difference. Below, check out the step-by-step images of how to make a cat scratcher:
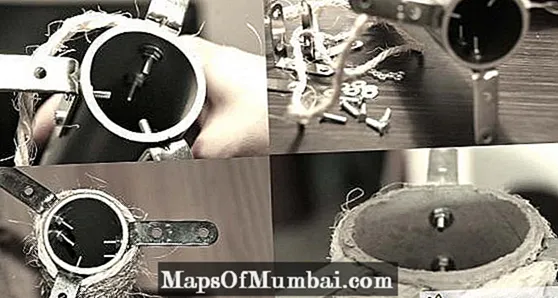
- Place the "L" fittings on the base of the tube. The number of fixings you must place on each tube will depend on the weight they have to support as well as the diameter of the tube. In our case, we placed three fittings on each end of the tubes.
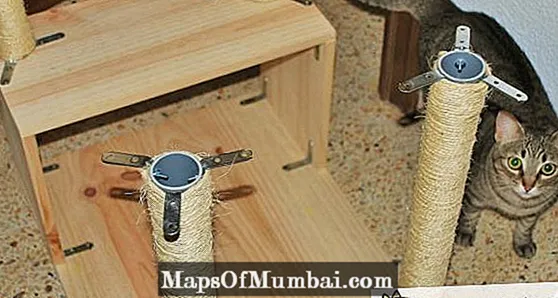
- Wrap the tubes with string. This is the most important part of the scratcher for your pet, so do it with care and care. Attach the end of the rope to one of the fittings and, after placing contact glue around the tube, wrap the string tightly around each turn.
- every 5-10 turns with the string, tap it with a hammer to make sure it stays very compact. That way, when your cat starts scratching it will be harder to make holes.
- The next step is assemble the structure. To do this, attach the tubes to the pieces of wood very well. Remember you can make a simple scraper with a base and a tube or a much more complex structure with floors and boxes.
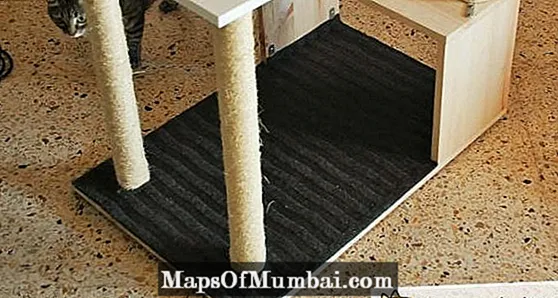
- Now it's time to start pad the base of the cat scratcher. If your home scraper has more than one floor, we recommend that for the base you use a thick fabric or a rug that is rough, such as those used in cars or at the entrances of houses, for example. This way, your cat will also be able to scratch and sharpen its nails in this scratcher area. If, on the contrary, it is a simple scraper, go directly to the next step.
- For put the mat, first cut the piece to the right measurements and make the cuts to fit the tubes well. Glue the mat to the wood base using contact glue. Then tap it with a hammer to eliminate any air gaps that might have been left.
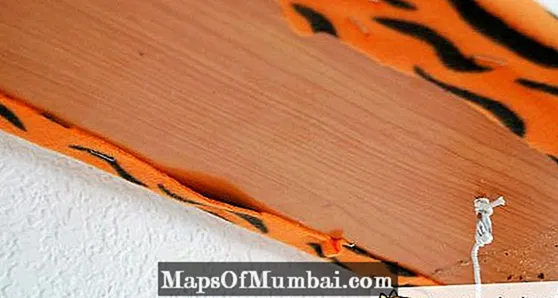
- For line the soft parts of your homemade scratcher, you just have to cut the pieces of fabric following the measurements of all surfaces and use the stapler for that. This tool will allow you to adjust the fabric to the edges of the wood and fix it.
- when to arrive at parts in which there are interspersed tubes, the only thing you will have to do is cuts in the fabric that you can later join with the stapler. If it's not perfectly lined, don't worry because your pet will like it and it's sure to be the happiest cat in the world when you rest and sleep in the scraper you're making for him.
- Remember that to place the filling, you only have to insert it and distribute it evenly over the entire surface you are lining, before stapling the last edge.
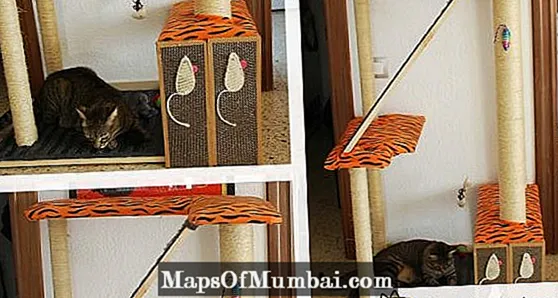
- Now it's just left add the details. Place various toys all over the scratcher, for example, a dangling doll, another one glued to one of the tubes, or a scratching area with some special decoration, such as mice. In this step you can use your imagination and try to add things that will entertain your cat. Remember that this is a puppy, so there are some objects that can be dangerous.
- Finally, before offering the new homemade scratcher to your cat, take a piece of clothing and rub it all over the scratcher, so it will smell like you and your pet will feel safer and more confident with the scratcher.
Tips for a functional scraper
As mentioned in the previous point, when you have the scratcher ready, ptake a dirty piece of clothing and pass it all over the scraper to keep your scent, this will be an incentive for your cat to know your toy name.
It's also important to choose a good place in the house to put your cat's new homemade scratcher. Once you decide the location, it is important that you do not take it out of the site as your pet will know that this is your zone.
And, if by chance, you have any problems with your cat's adaptation to the new scraper, check out the tips in our article Teaching a cat to use the scraper.
How to Make Cardboard Cat Scratchers
If you need a faster and super economical solution, you can also bet on this scraper made with just cardboard and cork pieces. The tutorial is very simple and to glue the materials, we suggest using hot glue.
Check out the video and see how to make cardboard cat scratchers: